Troubleshooting Login Problems in Oracle Applications 11i RDBMS Checks

1. Check the GUEST user information.

a. Run following SQL:

select user_name, start_date, end_date
from fnd_user
where user_name = 'GUEST';

This should return one row, end_date should be NULL or in advance of today's date, and start_date should be before today's date.

b. Validate the GUEST username/password combinations from the DBC file.

Using the GUEST_USER_PWD value in the DBC file (see step 2) run the following sql:

select fnd_web_sec.validate_login('GUEST',' ') from dual ;

This should return Yes

If this returns N, then do:

select fnd_message.get from dual;

This should give a reason why the validation failed, or an error message.
If this fails with a database error, confirm the problem is not specific to the GUEST user.

Redo the SQL command with a different userid (like sysadmin)

select fnd_web_sec.validate_login('SYSADMIN','') from dual;

Again, this command should return 'Y' if it is working OK.

If not, you should reload the jar files to the database using adadmin.

2. Run the following script to ensure there are no invalid objects:

select owner, object_name, object_type
from all_objects
where status != 'VALID'
order by owner, object_type, object_name;

Ideally, this should return no rows, but some invalid objects may be acceptable, depending on what they are.

3. Check Tablespace free space:

Ensure that the database tablespaces have not run out of room. This can result in '-1' errors and/or 'Session expired' errors if the system cannot add data to the ICX tables. To test that rows can be succesfully inserted, you can run the script below:

REM Start of script
insert into icx_sessions (session_id, user_id, created_by, creation_date,last_updated_by,last_update_date)
values (-99999, -99, -1, sysdate, -1, sysdate)
/

insert into icx_failures (created_by, creation_date,last_updated_by, last_update_date) values (-1, sysdate, -1, sysdate)
/

rollback
/

REM - End of script


Note - ensure these two insert statements are rolled back - you do not want these dummy records saved.

4. Review your Alert.log.

Does the RDBMS alert log show any errors? What are they? Report them in a TAR.

5. Review any database trace files.

cd to the directory specified by user_dump_dest in the init.ora file.&nbttempt at login may create a .trc file

6. Validate the FND_NODES table:

Run the following sql:

select NODE_NAME, NODE_ID , SERVER_ID , SERVER_ADDRESS from FND_NODES;

Each SERVER_ID and NODE_ID should be unique.

The Node Name for all servers involved for the instance should appear here. We typically expect this to be e hostname or virtual hostname (alias), not the IP address. If the servers do not appear, use OAM to register them.

The SERVER_ADDRESS is optional, but if present should reflect the IP of the host. If necessary, update the IP using the system administrator responsibility.

For 11.5.2 – 11.5.9 this should return 56 rows.
For 11.5.10 this should return 131 rows.
(11.5.10+) Note: in 11.5.10 the required plsql patckages can be quickly enabled


using the script: $FND_TOP/patch/sql/txkDisableModPLSQL.sql Y


7. Validate the FND_ENABLED_PLSQL table Run the script in Appendix B. For 11.5.2 – 11.5.9 this should return 56 rows. For 11.5.10 this should return 131 rows. (11.5.10+)

Note: in 11.5.10 the required plsql packages can be quickly enabled using the script: $FND_TOP/patch/sql/txkDisableModPLSQL.sql Y :

8. Validate the 'ICX_SESSIONS_S' synonym

This should be shown as owned by ICX, if not, drop the synonym and run adadmin to regenerate grants and synonyms.

9. Ensure ICX module is showing as an "Installed" module.

Run "adutconf.sql" to check this, particularly important to check if migrating to 11i from previous release of Applications.

10. Validate the ICX_PARAMETERS table.

Run the following SQL:

select count(*) from icx_parameters;

This should only return one row.

11. Check for Bug 3275654

Run the following SQL:

SELECT c.function_id, nvl(b.prompt,c.user_function_name) prompt,c.TYPE,a.menu_id from
fnd_responsibility_vl a,
fnd_menu_entries_vl b,
fnd_form_functions_vl c
where a.responsibility_id=21584
and a.menu_id=b.menu_id
and b.function_id=c.function_id
and c.type in ('WWW','WWK','SERVLET','JSP','FORM','INTEROPJSP');

This should only return one row. If not, apply Patch 3275654

12. Oracle 8i ONLY do the following sql:

select fnd_crypto.SmallRandomNumber from dual;

If this errors with: ORA-28235: algorithm not available
Then make sure you have the file $ORACLE_HOME/lib/naeet.o (7112 bytes) in place.
If not, you need to get the file from a known good source (like another instance or from the CD). Again use the size of the file to validate.

Next relink the Oracle Executables:

cd $ORACLE_HOME/rdbms/lib

make -f ins_rdbms.mk install

$ORACLE_HOME/bin/genclntsh.sh


OA Framework Checks
These are only applicable to OA Framework 5.7 and above. (11.5.9+)

13. Disable all personalizations on the homepage

Run the following sql:

set serverout on;
exec jdr_utils.listcustomizations(‘/oracle/apps/fnd/framework/navigate/webui/HomePG’);

If this returns any rows then you have personalizations.
Disable your personalizations by logging into forms directly and setting the profile option:

Disable Self Service Personal = Yes.

Then retest the login.

If the homepage works, you need to remove your “bad” personalization.

See Note 304670.1

14. You can turn on OA Framework diagnostics logging in several ways Please refer to Note 139863.1, section 4 Profile Options Reference for more information, if required. Set the following profile options at USER level for one Applications user. It is important this is setup for one user only. You can launch Core Forms directly to gain access to the profile options, as you may not be able to login if you are reading this note!


Name Value
---------------------------------------------
FND: Debug Log Enabled Yes
FND: Debug Log Filename /tmp/OAF_Debug.txt
FND: Debug Log Module %
FND: Debug Log Level STATEMENT


Login to Applications using the Apps Username you specified above. Any error or problem you experiance will still occur, but the file /tmp/OAF_Debug.txt should be created with some diagnostics information. Please upload this file to Oracle Support for further analysis. After you have created this diagnostics file, you should disable logging by setting the USER level profile option listed below:


Name Value
---------------------------------------------
FND: Debug Log Enabled No

Detailed checks
==============


Note: It is recommended that you have a current backup your system and have no users on the system while performing these checks/tests.

15. Enable detailed logging in iAS

Follow the steps in Appendix C to enable detailed logging for iAS.
Review the logs for errors.

16.Temporarily enable iAS to use symbolic links.

Replace all occurrences of

'Option -FollowSymLinks'
for

'Option +FollowSymLinks'
in

$IAS_ORACLE_HOME/Apache/Apache/conf/httpd.conf
and

$IAS_ORACLE_HOME/Apache/Apache/conf/httpd_pls.conf


and bounce apache. If this is the issue, you should then go back and implement the changes via autoconfig. The value from this is controllable from your Apps Context, see s_options_symlinks .
17. Clear the iAS cache.

To clear the jsp & modplsql caches either rename or delete the sub-directories below following directories and restart apache. This will clear out the compiled JSP classes and cached modplsql modules causing them to be automatically recompiled next time they are accessed.

rm -Rf $OA_HTML/_pages/*
rm -Rf $COMMON_TOP/_pages/*
rm -Rf $IAS_ORACLE_HOME/Apache/modplsql/cache/*


Note: Depending on your configuration and patch level all directories may not exist.

18. Check the sqlnet.ora setup in the database Oracle Home.

Edit the

$ORACLE_HOME/network/admin/sqlnet.ora

Is tcp.validnode_checking enabled (i.e. = yes)? If so, make sure the parameter tcp.invited_nodes contains an entry for all the nodes involved in your configuration. This parameter, in conjunction with tcp.validnode_checking determines which clients can connect to the database.

Or you can temporarily disable node checking by removing the tcp.validnode_checking and retest. This is enabled for security reasons.

19. Modify AppsLocalLogin.jsp to trap exceptions.

If you get java error while using the login page like NoClassDefFound or NullPointerException, we need to trap the context of the message.

Backup and edit your:

$OA_HTML/AppsLocalLogin.jsp.

On the line that reads


} catch(Exception e) {}
Change to:

} catch(Exception e) {
} catch(Throwable t) {
System.err.println("OSS: Caught throwable in AppsLocalLogin.jsp : " +t.toString()); t.printStackTrace();
}

Then bounce Apache and reload the page and more detail should show up in the OACoreGroup.0.stderr file.


< dbc="


20. Check file permissions are not causing any problems.


Check file permissions are appropriate. In particular, the liboci806jdbc.so (.sl on HP, .DLL on NT) shared library should have read, write and execute permissions. It may be advisable to temporarily change all permissions in $JAVA_TOP to read, write and execute to see if it resolves the problem. On UNIX, you can use the command 'chmod -R 777 $JAVA_TOP', assuming $JAVA_TOP has been set correctly in your environment.


21. Regenerate JAVA_TOP:

Ensure you have a full backup of your system! To run this process, run adadmin and select Maintain Applications Files then Copy Files to Destinations.

22. Generate database trace and SQL*Net traces.

To set-up SQL*Net Trace on the Web Server set

TRACE_LEVEL_CLIENT = 16
in the

$TNS_ADMIN/SQLNET.ORA

file. This should be in the iAS file system and not in the 8.0.6. Oracle Home. By default the SQL*Net trace file will be called 'sqlnet.trc'.

Troubleshooting Login Problems IAS Checks

You can check your version by doing:

$IAS_ORACLE_HOME/Apache/Apache/bin/httpd –version

1. Validate TNS Connectivity

a. Make sure you can TNSPING and sqlplus the database alias used from the APPL_TOP (i.e. After running APPSORA.env). Do:

tnsping [sid]
sqlplus appsun/appspw
sqlplus appsun/appspw@[sid]

Also, validate that APPLSYSPUB/PUB can connect


b. Change to the $IAS_ORACLE_HOME, run the [sid]_[host].env file.

This will set the $ORACLE_HOME to be iAS.
Now check that you can TNSPING and sqlplus the database alias.

2. Determine the DBC file in use and make sure it is valid:

a. (11.5.9+) Run the profile option query provided in Appendix A when prompted for profile_option_name enter: APPS_DATABASE_ID.
If this returns a value, then this is the DBC file name that Apps is expecting to use.
Otherwise do:

select host_name'_'instance_name from v$instance;

b. Validate the OS location & permissions of the dbc file. Do:

ls –al $FND_SECURE/*.dbc (11.5.10+).

If $FND_SECURE is not set, then the dbc filebr> This should return the value from step 1ad.
The permissions on the file should be 644 and it should be owned my the “applmgr” user.


c. Verify the contents of the dbc file with the AdminAppServer utility. Do:

java oracle.apps.fnd.security.AdminAppServer appsun/appspw STATUS DBC=[path to dbc $FND_SECURE]/[dbc_name].dbc

This should return STATUS: VALID and the current status of AUTHENTICATION: [SECURE/ON/OFF/null] among other values.


d. Validate the autoconfig context file (11.5.8+) uses the correct dbc file.

Your context file is located in $APPL_TOP/admin and is typically named [SID]_[host].xml. Review the value for s_dbc_file_name, it should match the dbc just tested in 1c.

If any of this errors you should run autoconfig and/or $COMMON_TOP/admin/install/adgendbc.sh appsus appspw and retest (this will require iAS restart)


3. Is the web server running and able to render static html?

a. Are you able to access the page:

http:// :/aplogon.html

b. If not, then do:

ps –fu [applmgr] grep http
(or ps –fu [applmgr] grep http wc –l )

This should return at least 5 http processes running … otherwise you webserver may not be started…Make sure you are using the Oracle provided start script in:

$COMMON_TOP/admin/scripts/[SID]_[host]

If these tests fail you need to review your iAS installation and/or log a TAR.

4. (11.5.2-11.5.9) Check that the CGI environment and mod_plsql is functioning

a. Run the following URL:
http://:/pls//FND_WEB.PING

If you are unable to run the procedure below because of an 'internal error' or a 'cannot find host' or a similar error, then it could indicate that there is a problem with the PLSQL Configuration. Failures here may indicate problems with mod_plsql…Follow Note 116715.1 - How to Enable Logging for the PL/SQL Gateway. Redo the test and log a tar with the logs attached.

Or this may be a result of a RDBMS issue (For example - invalid packages, rdbms crashed)…See RDBMS section below.

b. Validate the APPS password used by the plsql gateway.

The password may be stored as clear text as a parameter (password= APPSpw) in
$IAS_ORACLE_HOME/Apache/modplsql/cfg/wdbsvr.app
If the password is encrypted in the file, update the parameter:

administrators = system
to be
administrators = all
Then navigate to:
http://:/pls//admin_/

Select the Gateway Database Access Descriptor Settings link
Select the Edit icon next to the Database Access Descriptor Name which matches your SID
Make sure the Oracle User Name = APPS
Enter the Apps user password in the Oracle Password field.
Make sure the Oracle Connect String is the SID for the instance.
If you made any changes here you will have to review your autoconfig context file to make sure the changes are permanent.

(11.5.10) After validating the above items, you may still get 'Forbidden - You don't have permission to access /pls//fnd_web.ping' on this server.” This may be by design for enhanced security. Please skip to the next test.

5. Ensure that JDK is installed correctly & is a certified version.

a. Get the value of wrapper.bin in:

$iAS_ORACLE_HOME/Apache/Jserv/etc
This will either point directly to the java executable in use or to $iAS_ORACLE_HOME/Apache/Apache/bin/java.sh.
If this points to the java.sh go to step 5b…otherwise skip to step 5c.

b.Open the java.sh File under $iAS_ORACLE_HOME/Apache/Apache/bin. In this file and you will find path to java executable in variable "JSERVJAVA"


c. Use the absolute path to the java executable and do:
/absolute/path/to/java –version

e. Check that the version returned is certified by using the certify website on Metalink.
Assuming this returns a supported version of JDK. Use the following notes to validate your JDK installation (i.e. that all required patches, autoconfig templates, etc have been completed):
Note 304099.1 => if using J2SE Version 5.0

Or

Note 246105.1 => if using J2SE 1.4

OR

Note 130091.1 => if using JDK 1.3

6. Use the following programs to verify the installation and check that the servlets are functioning.

a. http(s)://:/servlets/IsItWorking
(11.5.10) This may fail with:


Forbidden You don't have permission to access /servlets/IsItWorking on this server.
This is due to enhanced security delivered with the autoconfig templates.
Please try test 4b instead.


b.http(s)://:/servlets/Hello

If this one fails, this indicates an issue with your Jserv set-up. You then need to follow Note 230688.1 to drill down into this problem.


7. Validate that jsp work.

a. http(s)://:/OA_HTML/jsp/fnd/aoljtest.jsp

If this one fails to render, this indicates an issue with your Jserv set-up. You then need to follow Note 230688.1 to drill down into this problem.Otherwise you enter the values requested, and follow the link at the bottom of the first page to run through this set of diagnostic tests. Report all tests that fail in a TAR.

Note: The initial page of this test may show some "missing" files.
Depending on your configuration the following missing files are acceptable:

apps.zip (is normal to be missing since it has been exploded on $JAVA_TOP (ref : Note 220188.1 ))
iAS/mp/jlib/opreopi-rt.jar (Used for Oracle Personalization. Can be ignored if you are not using MP.)
iAS/mp/jlib/dmtutil.jar (Used for Data Mining)
iAS/dm/jlib/odmapi.jar (Used for Data Mining - If you are using Data Mining, and these are listed as missing, please see Note 281739.1 )
iAS/portal30/jpdk/lib/partnerApp.jar (If you are not using Portal, this can be ignored.)


8. Check the "session.topleveldomain" setting in the


$IAS_ORACLE_HOME/Apache/Jserv/etc/zone.properties
This should match the domain you are using as defined in the SESSION_COOKIE_DOMAIN column in ICX_PARAMETERS table.

From sqlplus do:

select SESSION_COOKIE_DOMAIN from ICX_PARAMETERS;


Notes: It is acceptable to have SESSION_COOKIE_DOMAIN set to null
You MUST have a valid domain that is composed of 2 or more components (see Bug 2510732). I.e: .oracle is an INVALID domain, but .oracle.com IS a valid domain.

adaimgr AutoUpgrade

After 8i to 9i Migration, The steps to be followed.

************* Start of AutoUpgrade session *************

AutoUpgrade version: 11.5.0
AutoUpgrade started at: Thu Apr 10 2008 09:53:09

APPL_TOP is set to /u01/11i/uat/applmgr/uatappl

NLS_LANG value from the environment is : American_America.WE8ISO8859P1
NLS_LANG value for this AD utility run is : AMERICAN_AMERICA.WE8ISO8859P1

It is critical that your Oracle Applications, RDBMS and related tools are
compatible and certified combinations. If you are uncertain whether a
combination is certified please contact Oracle Support Services.

Are you certain you are running a certified release combination [No] ? Yes

You can be notified by email if a failure occurs.
Do you wish to activate this feature [No] ? No

Please enter the batchsize [1000] : 1000


Please enter the name of the Oracle Applications System that this
APPL_TOP belongs to.

The Applications System name must be unique across all Oracle
Applications Systems at your site, must be from 1 to 30 characters
long, may only contain alphanumeric and underscore characters,
and must start with a letter.

Sample Applications System names are: "prod", "test", "demo" and
"Development_2".

Applications System Name [uat] : uat_zeus


NOTE: If you do not have or choose not to have certain types of files installed
in this APPL_TOP, you may not be able to perform certain tasks.

Example 1: If you don't have files used for installing or upgrading
the database installed in this area, you cannot install or upgrade
the database from this APPL_TOP.

Example 2: If you don't have forms files installed in this area, you cannot
generate them or run them from this APPL_TOP.

Example 3: If you don't have concurrent program files installed in this area,
you cannot relink concurrent programs or generate reports from this APPL_TOP.


Do you currently have or want to install files used for installing or upgrading
the database in this APPL_TOP [YES] ? YES


Do you currently have or want to install Java and HTML files for HTML-based
functionality in this APPL_TOP [YES] ? YES


Do you currently have or want to install Oracle Applications forms files
in this APPL_TOP [YES] ? YES


Do you currently have or want to install concurrent program files
in this APPL_TOP [YES] ? YES


Please enter the name Oracle Applications will use to identify this APPL_TOP.

The APPL_TOP name you select must be unique within an Oracle Applications
System, must be from 1 to 30 characters long, may only contain
alphanumeric and underscore characters, and must start with a letter.

Sample APPL_TOP Names are: "prod_all", "demo3_forms2", and "forms1".

APPL_TOP Name [zeus] : uat_zeus_appltop

You are about to install or upgrade Oracle Applications product tables
in your ORACLE database 'uat'
using ORACLE executables in '/u01/11i/uat/applmgr/uatora/8.0.6'.

Is this the correct database [Yes] ? Yes

AutoUpgrade needs the password for your 'SYSTEM' ORACLE schema
in order to determine your installation configuration.

Enter the password for your 'SYSTEM' ORACLE schema: *****


Connecting to SYSTEM......Connected successfully.

There exists one FND_PRODUCT_INSTALLATIONS table.
AutoUpgrade will upgrade the existing product group.

The ORACLE username specified below for Application Object Library
uniquely identifies your existing product group: APPLSYS

Enter the ORACLE password of Application Object Library [APPS] : *****

AutoUpgrade is verifying your username/password.
Connecting to APPLSYS......Connected successfully.

The status of various features in this run of AutoUpgrade is:

<-Feature version in->
Feature Active? APPLTOP Data model Flags
------------------------------ ------- -------- ----------- -----------
CHECKFILE No 1 -1 Y N N Y N N
PREREQ No 6 -1 Y N N Y N N
CONCURRENT_SESSIONS No 2 -1 Y Y N Y Y N
PATCH_TIMING No 2 -1 Y N N Y N N
PATCH_HIST_IN_DB No 6 -1 Y N N Y N N
SCHEMA_SWAP No 1 -1 Y N N Y Y N


Connecting to SYSTEM......Connected successfully.

Connecting to APPLSYS......Connected successfully.

Identifier for the current session is 1

Reading product information from file...

Reading language and territory information from file...

Reading language information from applUS.txt ...

Reading database to see what industry is currently installed.


Oracle Applications is currently installed for Commercial or for-profit use.

Do you wish to:
1) Continue to use Oracle Applications for Commercial or for-profit use.
2) Convert Oracle Applications to government, education or
not-for-profit use

Enter your choice [1] : 1


Reading FND_LANGUAGES to see what is currently installed.
Currently, the following languages are installed:

Code Language Status
---- --------------------------------------- ---------
US American English Base
ESA Latin American Spanish Install

Reading language information from applESA.txt ...

Your base language will be AMERICAN.

Your other languages to install are: LATIN AMERICAN SPANISH

Setting up module information.
Reading database for information about the modules.
Saving module information.
Reading database for information about the products.
Connecting to SYSTEM......Connected successfully.

Connecting to APPLSYS......Connected successfully.

Connecting to SYSTEM......Connected successfully.

Reading database for information about how products depend on each other.
Connecting to APPLSYS......Connected successfully.

Reading topfile.txt ...

Saving product information.
Connecting to SYSTEM......Connected successfully.

Connecting to APPLSYS......Connected successfully.

Connecting to APPS......Connected successfully.

Connecting to SYSTEM......Connected successfully.

Saving task information.

AutoUpgrade Main Menu
--------------------------------------------------

1. Choose database parameters

2. Choose overall tasks and their parameters

3. Run the selected tasks

4. Exit AutoUpgrade

* Please use License Manager to license additional

* products or modules after the upgrade is complete.


Enter your choice : 1

AutoUpgrade - Choose database parameters

- O - - S - --- M --- --- I --- --- D ---
Product Action ORACLE Sizing Main Index Default
# Name User ID Factor Tablespace Tablespace Tablespace
-- ---------------------- - ------- ------ ---------- ---------- ----------
1 Application Object Lib U APPLSYS 100 AOLD AOLX AOLD
2 Application Utilities U APPLSYS 0 AOLD AOLX AOLD
3 Applications DBA U APPLSYS 0 AOLD AOLX AOLD
4 Alert U APPLSYS 100 AOLD AOLX AOLD
5 Global Accounting Engi I AX 100 AXD AXX AXD
6 Common Modules-AK I AK 100 AKD AKX AKD
7 Subledger Accounting S XLA 100 XLAD XLAX XLAD
8 General Ledger U GL 100 GLD GLX GLD

There are 209 Oracle Applications. Enter U/D to scroll up/down.

Note: This will display all the tablespace

- To change a database parameter for a product;
INCLUDE the LETTER ABOVE the COLUMN you want to change
U / D / T / B - Press up/down/top/bottom to see other products
[Return] - To return to the AutoUpgrade Main Menu

Enter your choice (for example, 1M) :

AutoUpgrade error:

APPLSYSD
APPLSYSX

The above tablespaces do not exist in your database.
Please either create the missing tablespaces or change your
tablespace selection to exclude these tablespaces.


Review the messages above, then press [Return] to continue.

AutoUpgrade - Choose database parameters

- O - - S - --- M --- --- I --- --- D ---
Product Action ORACLE Sizing Main Index Default
# Name User ID Factor Tablespace Tablespace Tablespace
-- ---------------------- - ------- ------ ---------- ---------- ----------
39 Applications Shared Te S APPLSYS 100 APPLSYSD APPLSYSX AOLD
40 Enterprise Asset Manag EAM 100 EAMD EAMX EAMD
41 Transportation Executi FTE 100 FTED FTEX FTED
42 Public Sector Financia IGI 100 IGID IGIX IGID
43 Internet Procurement E ITG 100 ITGD ITGX ITGD
44 Inventory Optimization MSR 100 MSRD MSRX MSRD
45 Product Development IPD 100 IPDD IPDX IPDD
46 Product Development In ENI 100 ENID ENIX ENID

There are 209 Oracle Applications. Enter U/D to scroll up/down.


- To change a database parameter for a product;
INCLUDE the LETTER ABOVE the COLUMN you want to change
U / D / T / B - Press up/down/top/bottom to see other products
[Return] - To return to the AutoUpgrade Main Menu

Enter your choice (for example, 1M) : 39M

Enter the ORACLE tablespace name where you wish to store
Applications Shared Technology tables in ORACLE username APPLSYS [APPLSYSD] : AOLD

Connecting to APPLSYS......Connected successfully.

AutoUpgrade - Choose database parameters

- O - - S - --- M --- --- I --- --- D ---
Product Action ORACLE Sizing Main Index Default
# Name User ID Factor Tablespace Tablespace Tablespace
-- ---------------------- - ------- ------ ---------- ---------- ----------
33 Report Manager FRM 100 FRMD FRMX FRMD
34 Activity Based Managem ABM 100 ABMD ABMX ABMD
35 Balanced Scorecard BSC 100 BSCD BSCX BSCD
36 SEM Exchange EAA 100 EAAD EAAX EAAD
37 Value Based Management EVM 100 EVMD EVMX EVMD
38 Strategic Enterprise M FEM 100 FEMD FEMX FEMD
39 Applications Shared Te S APPLSYS 100 AOLD APPLSYSX AOLD
40 Enterprise Asset Manag EAM 100 EAMD EAMX EAMD

There are 209 Oracle Applications. Enter U/D to scroll up/down.


- To change a database parameter for a product;
INCLUDE the LETTER ABOVE the COLUMN you want to change
U / D / T / B - Press up/down/top/bottom to see other products
[Return] - To return to the AutoUpgrade Main Menu

Enter your choice (for example, 1M) : 39I

Enter the ORACLE tablespace name where you wish to store
Applications Shared Technology indexes in ORACLE username APPLSYS [APPLSYSX] : AOLX


Connecting to SYSTEM......Connected successfully.

Connecting to APPLSYS......Connected successfully.

AutoUpgrade - Choose database parameters

- O - - S - --- M --- --- I --- --- D ---
Product Action ORACLE Sizing Main Index Default
# Name User ID Factor Tablespace Tablespace Tablespace
-- ---------------------- - ------- ------ ---------- ---------- ----------
33 Report Manager FRM 100 FRMD FRMX FRMD
34 Activity Based Managem ABM 100 ABMD ABMX ABMD
35 Balanced Scorecard BSC 100 BSCD BSCX BSCD
36 SEM Exchange EAA 100 EAAD EAAX EAAD
37 Value Based Management EVM 100 EVMD EVMX EVMD
38 Strategic Enterprise M FEM 100 FEMD FEMX FEMD
39 Applications Shared Te S APPLSYS 100 AOLD AOLX AOLD
40 Enterprise Asset Manag EAM 100 EAMD EAMX EAMD

There are 209 Oracle Applications. Enter U/D to scroll up/down.


- To change a database parameter for a product;
INCLUDE the LETTER ABOVE the COLUMN you want to change
U / D / T / B - Press up/down/top/bottom to see other products
[Return] - To return to the AutoUpgrade Main Menu

Enter your choice (for example, 1M) :

Connecting to SYSTEM......Connected successfully.

Saving your choices...
Done.

Backing up restart files, if any......Done.


AutoUpgrade Main Menu
--------------------------------------------------

1. Choose database parameters

2. Choose overall tasks and their parameters

3. Run the selected tasks

4. Exit AutoUpgrade

* Please use License Manager to license additional
* products or modules after the upgrade is complete.


Enter your choice : 2

AutoUpgrade - Choose overall tasks and their parameters

# Task Do it? Parameters
-- ------------------------------------------ ------ --------------------
1 Verify files necessary for upgrade YES
2 Install or upgrade database objects YES


There are 2 tasks. Enter U/D to scroll up/down.

- To change YES to NO or NO to YES
(You cannot change a task marked with a *)
P - To change the parameters of a task
U / D - To page up/down to see other tasks
[Return] - To return to the AutoUpgrade Main Menu

Enter your choice (for example 2 or 2P) :

Saving your choices...
Done.

Backing up restart files, if any......Done.


AutoUpgrade Main Menu
--------------------------------------------------

1. Choose database parameters

2. Choose overall tasks and their parameters

3. Run the selected tasks

4. Exit AutoUpgrade

* Please use License Manager to license additional
* products or modules after the upgrade is complete.

Enter your choice : 3

Connecting to APPLSYS......Connected successfully.

Connecting to SYSTEM......Connected successfully.

Connecting to APPS......Connected successfully.


AD utilities can support a maximum of 999 workers. Your
current database configuration supports a maximum of 992 workers.
Oracle recommends that you use between 24 and 48 workers.


Enter the number of workers [24] : 24

Now process will start

Complete Upgrade Steps on 11.0.3 to 11i Upgrade

bash-2.05b$ echo $ORACLE_HOME
/u01/app/oracle/product/806

bash-2.05b$ echo $ORACLE_SID
dev

bash-2.05b$ echo $PATH
/usr/bin:/etc:/usr/sbin:/usr/ucb:/home/oracle/bin:/usr/bin/X11:/sbin:/usr/bin:/etc:/usr/sbin:/usr/ucb:/usr/bin/X11:/sbin:/usr/java14/jre/bin:/usr/java14/bin:.:/u01/app/oracle/product/806/bin::/u01/app/oracle/product/806/bin:/u01/app/oracle/product/806/bin

b-2.05b$ echo $LD_LIBRARY_PATH
/u01/app/oracle/local/java/jre1.1.6/lib:/u01/app/oracle/product/806/lib:


bash-2.05b$ svrmgrl

Oracle Server Manager Release 3.0.6.0.0 - Production

(c) Copyright 1999, Oracle Corporation. All Rights Reserved.

Oracle8 Enterprise Edition Release 8.0.6.3.0 - Production
PL/SQL Release 8.0.6.3.0 - Production

SVRMGR> connect internal
Connected.
SVRMGR> startup nomount pfile=/u01/app/oracle/product/806/dbs/initdev.ora
ORACLE instance started.
Total System Global Area 1919251520 bytes
Fixed Size 50240 bytes
Variable Size 1069846528 bytes
Database Buffers 838860800 bytes
Redo Buffers 10493952 bytes
SVRMGR> @/u01/app/oracle/product/bmcntl.sql
Statement processed.

SVRMGR> ALTER DATABASE OPEN RESETLOGS;
Statement processed.


SVRMGR> SELECT STATUS,LOGINS,INSTANCE_NAME FROM V$INSTANCE;
STATUS LOGINS INSTANCE_NAME
------- ---------- ----------------
OPEN ALLOWED dev
1 row selected.


Sys Passwd Change
orapwd file=$ORACLE_HOME/dbs/orapwdev password=oracle entries=5


Configure Tnsnames and Listeners


Subject: Migrating Apps Release 11.0 from UNIX Host To A Second UNIX Host
Doc ID: Note:74838.1

select distinct LOGFILE_NODE_NAME from fnd_concurrent_requests;
select distinct OUTFILE_NODE_NAME from fnd_concurrent_requests;


SVRMGR> select distinct LOGFILE_NODE_NAME from fnd_concurrent_requests;
LOGFILE_NODE_NAME
------------------------------
Atlas

update fnd_concurrent_requests set LOGFILE_NODE_NAME='instancezu'
where LOGFILE_NODE_NAME='atlas'

SVRMGR> select distinct LOGFILE_NODE_NAME from fnd_concurrent_requests;
LOGFILE_NODE_NAME
------------------------------
instancezu

2 rows selected.

SVRMGR> select distinct OUTFILE_NODE_NAME from fnd_concurrent_requests;
OUTFILE_NODE_NAME
------------------------------
atlas

update fnd_concurrent_requests set OUTFILE_NODE_NAME='instancezu'
where OUTFILE_NODE_NAME='atlas'


SVRMGR> update fnd_concurrent_requests set OUTFILE_NODE_NAME='instancezu'
where OUTFILE_NODE_NAME='atlas';

18313 rows processed.

SVRMGR> select distinct OUTFILE_NODE_NAME from fnd_concurrent_requests;
OUTFILE_NODE_NAME
------------------------------
instancezu


OLD_HOST
/u01/app/applmgr/1103/prod/admin/logprod/l31706384.req
/u01/app/applmgr/1103/prod/admin/outprod/INVMANG.31706384

NEW_HOST
/u01/app/applmgr/1103/dev/admin/logdev
/u01/app/applmgr/1103/dev/admin/outdev


LOGFILE_NAME

update fnd_concurrent_requests set
LOGFILE_NAME=replace(LOGFILE_NAME,'/u01/app/applmgr/1103/prod/admin/logprod/','/u01/app/applmgr/1103/dev/admin/logdev')


OUTFILE_NAME

update fnd_concurrent_requests set
OUTFILE_NAME=replace(OUTFILE_NAME,'/u01/app/applmgr/1103/prod/admin/outprod','/u01/app/applmgr/1103/dev/admin/outdev')


FND_CONCURRENT_PROCESSES

The logfile name of the concurrent managers is stored in
fnd_concurrent_processes.LOGFILE_NAME

The nodename of the concurrent managers is stored in
FND_CONCURRENT_PROCESSES.NODE_NAME


select distinct(NODE_NAME) from fnd_concurrent_processes;

update fnd_concurrent_processes set NODE_NAME = 'instancezu';


SVRMGR> select distinct(NODE_NAME) from fnd_concurrent_processes;
NODE_NAME
------------------------------
Atlas

1 row selected.


SVRMGR> update fnd_concurrent_processes set NODE_NAME = 'instancezu';
63 rows processed.


SVRMGR> select distinct(NODE_NAME) from fnd_concurrent_processes;
NODE_NAME
------------------------------
instancezu
1 row selected.


update global_name set global_name='DEV.WORLD' where global_name='PROD.WORLD'


/u01/app/applmgr/1103/dev/html/html/US
Change PROD to DEV
ICXUDUL_DEV.htm


2.0 Pre Upg tasks on 11.0.3 instance

2.0.1. Apply the Patch 1268797
cd $FND_TOP/patch/110/sql
sqlplus / @afstatrn.sql True

1- sqlplus applsys/xxxx@afstatdr.sql applsys xxxx
2- sqlplus applsys/xxxxx @afstatsg.sql oracle apps
3- imp parfile=afstats2.dat userid=applsys/xxxxxx
Or
3-imp userid=applsys/xxxxxx file=afstats2.dmp ignore=y grants=n full=y commit=n buffer=8000000
4- sqlplus applsys/xxxxxx @afstatgt.sql applsys xxxxxx apps xxxxxx
5- sqlplus apps/xxxxxx @AFSTATSS.pls
6- sqlplus apps/xxxxxx @fndpker.sql apps xxxxxx PACKAGE FND_STATS
7- sqlplus apps/xxxxxx @AFSTATSB.pls
8- sqlplus apps/xxxxxx @fndpker.sql apps xxxxxx PACKAGE_BODY FND_STATS


2.0.2. Apply the TUMS patch 3422686

cd $AD_TOP/patch/110/sql
sqlplus apps/app @adtums.sql /u10/app/convr11/tmp

2.0.3 Set the File attachments

2.0.4 . Submit “Purge Concurrent
Requests” with a retention
period of 7 days

2.0.5. Check for rows in

ALR_ACTION_HISTORY Table
Select count(*) from apps. ALR_ACTION_HISTORY;

If No rows then Apply the Patch 451137


2.0.6. Disabled all the Custom Triggers and
Alerts

2.0.7 Disabled Database Audit trial in init.ora
file

Audit_trial= false or comment out the line.


2.0.8 Validate and Compile Apps Schema
Use adadmin Utility

2.0.9 Backup the INVALIDS in a Table

Create table BEFORE_PREUPG_INVALIDS as select * from dba_objects where status=’INVALID’;

2.0.10. Make a note of passwords for following
users

SYSADMIN
GUEST
Oracle user - APPS
Oracle user – SYSTEM


3.0 Pre Upgrade Tasks on 11i Instance


3.0.1. Run Rapid install on DB tier and Apps Tier
./rapidwiz

3.0.3 Apply the Forms Patch set 18


If Reuired will Apply
3.0.4 Install 9.2.0.7 software on DB tier (4163445)
./runInstaller

3.0.5 Install Latest Opatch 2617419 on DB Tier
Unzip *2617419*.zip in $OARCLE_HOME

3.0.6 Applied Database patch 4192148 for Import
Issue

3.0.7 Update the .profile in MT and DB Tiers .
On MT :
- /<>/applmgr/r11i<>appl/APPSORA.env
On DB
- $ORACLE_HOME/ R11i<> _ .env

3.0.8 InstallPrep.sh script as per Note 189256.1


3.0.9 Configured tnsnames.ora on MT to connect to 8.1.7 database of 11.0.3 instance

3.0.10. Login to MT tier and perform following pre
upgrade tasks

Verify custom index privileges

cd $APPL_TOP/admin/preupg
sqlplus apps/oracle11i afindxpr.sql applsys
sqlplus apps/oracle11i afpregdi.sql

Make sure orders are in a supported status

cd $ONT_TOP/patch/115/sql
sqlplus apps/oracle11i@ontexc07.sql

Review Item Validation Org settings

cd $ONT_TOP/patch/115/sql
sqlplus apps/oracle11i@ontexc05.sql

Close open pick slips/picking batches or open deliveries/departures

cd $WSH_TOP/patch/115/sql
sqlplus apps/oracle11i@wshbdord.sql

Validate inventory organization data

cd $WSH_TOP/patch/115/sql

sqlplus apps/oracle11i@wshpre00.sql

Review cycles that may not be upgraded

cd $ONT_TOP/patch/115/sql
sqlplus apps/oracle11i@ontexc08.sql

Clear open interface tables

cd $APPL_TOP/admin/preupg
sqlplus apps/oracle11i@
Run above sql for each of the following scripts:
Requisitions Open Interface (pocntreq.sql)
Purchasing Documents Open Interface (pocntpoh.sql)
Receiving Open Interface (pocntrcv.sql)

Import and purge Invoice Import Interface expense reports and invoices

cd $APPL_TOP/admin/preupg
sqlplus apps/oracle11i@apuinimp.sql

Diagnose problems in the data

cd $AR_TOP/patch/115/sql
sqlplus apps/oracle11i@ar115chk.sql

Identify potential ORACLE schema conflicts

cd $APPL_TOP/admin/preupg
sqlplus applsys/oracle11i@adpuver.sql

3.0.10 Apply Family Consolidated Upgrade Patch for Financials - 3993353 with preinstall


Please Find the 806 - 9i Upgrade Steps

Subject: Complete Upgrade Checklist for Manual Upgrades from 8.X / 9.0.1 to Oracle9iR2 (9.2.0) Doc ID: Note: 159657.1


Setup the Enterprise Edition for Oracle 9i

These scripts create objects required by the RDBMS and other technology stack components on the database server Login to 11i Database Tier

Check for output of dba_registry is as given below

col comp_name for a40
col version for a15
select comp_name, version, status FROM dba_registry;

Created folder $ORACLE_HOME/appsutil/admin

Copied addb920.sql, adsy920.sql, adjv920.sql, admsc920.sql, and adgrants.sql from $APPL_TOP/admin to $ORACLE_HOME/appsutil/admin

sqlplus /nolog
connect SYSTEM/oracle11idev
@addb920.sql -- Sets up database SYS schema

sqlplus /nolog
connect SYSTEM/oracle11idev
@adsy920.sql -- Sets up database SYSTEM schema

sqlplus /nolog
connect SYSTEM/oracle11idev
@adjv920.sql - Installs Java Virtual Machine


sqlplus /nolog
connect SYSTEM/oracle11idev
@admsc920.sql FALSE CTXD TEMP $ORACLE_HOME/ctx/lib/libctxx9.so

Check for output of dba_registry is as given below

col comp_name for a40
col version for a15
select comp_name, version, status FROM dba_registry;


Change Roll Back to UNDO Tablespace

select segment_name,tablespace_name,status from dba_rollback_segs;

SEGMENT_NAME TABLESPACE_NAME
------------------------------ ------------------------------
SYSTEM SYSTEM
ROLL301 RBS3
ROLL302 RBS3


select file_name,tablespace_name, bytes from dba_data_files where tablespace_name = 'RBS3';


select 'alter rollback segment ' SEGMENT_NAME' offline;' from dba_rollback_segs;

SQL> select 'alter rollback segment ' SEGMENT_NAME' offline;' from dba_rollback_segs;

SEGMENT_NAME
=============

alter rollback segment ROLL301 offline;
alter rollback segment ROLL302 offline;


SQL> alter rollback segment ROLL302 offline;

alter rollback segment ROLL303 offline;

Rollback segment altered.


SQL> alter rollback segment ROLL304 offline;

alter rollback segment ROLL305 offline;
alter rollback segment ROLL306 offline;

Rollback segment altered.


SQL> alter rollback segment ROLL307 offline;

Rollback segment altered.

SQL> alter rollback segment ROLL308 offline;

Rollback segment altered.


SQL> drop rollback segment ;

select 'drop rollback segment ' SEGMENT_NAME';' FROM from dba_rollback_segs;


SQL> select 'drop rollback segment ' SEGMENT_NAME';' FROM dba_rollback_segs;

'DROPROLLBACKSEGMENT'SEGMENT_NAME';'
------------------------------------------------------

drop rollback segment ROLL301;
drop rollback segment ROLL302;

alter tablespace RBS3 offline;


SQL> alter tablespace RBS3 offline;
alter tablespace RBS2 offline;

drop tablespace RBS2;


Tablespace altered.


create undo tablespace

create undo tablespace APPS_UNDOTS1 datafile '/db2/oradata/dev/data/undodbs01.dbf' size 3000M reuse extent management local;

ALTER TABLESPACE APPS_UNDOTS1 ADD DATAFILE '/db2/oradata/dev/data/undodbs02.dbf' size 3000M;

create undo tablespace APPS_UNDOTS2 datafile '/db2/oradata/dev/data/undodbs04.dbf' size 3000M reuse extent management local;

ALTER TABLESPACE APPS_UNDOTS2 ADD DATAFILE '/db2/oradata/dev/data/undodbs05.dbf' size 2000M;


CREATE TEMPORARY TABLESPACE

alter tablespace temp offline;

SQL> alter tablespace temp offline;

SQL> drop tablespace temp;


CREATE TEMPORARY TABLESPACE temp
TEMPFILE '/db2/oradata/dev/data/temp01.dbf' SIZE 3000M
EXTENT MANAGEMENT LOCAL UNIFORM SIZE 16M;

ALTER TABLESPACE temp
ADD TEMPFILE '/db2/oradata/dev/data/temp02.dbf' SIZE 2000M REUSE;


select * from dba_temp_files;
SELECT * FROM DATABASE_PROPERTIES where PROPERTY_NAME='DEFAULT_TEMP_TABLESPACE';

Set Default TEMP TBS

ALTER DATABASE DEFAULT TEMPORARY TABLESPACE temp;


Convert existing tablespaces to local extent management


We recommend using local extent management to increase performance. To
convert all non-SYSTEM tablespaces from Data Dictionary extent management to
local extent management, run the following script:

UNIX:
$ cd $APPL_TOP/admin/preupg
$ sqlplus system/finalf @adtbscnv.pls finalf


SQL> desc dba_tablespaces;
SQL> select EXTENT_MANAGEMENT, count(*) from dba_tablespaces group by EXTENT_MANAGEMENT;


bash-2.05b$ pwd
/u012/11i/ora/oracle/devsappl/admin
adsysapp2.sql

bash-2.05b$ sqlplus system/finalf@dev

SQL> @adsysapp2.sql
Enter value for 1: finalf


alter database datafile '/db2/oradata/dev/data/system01.dbf' resize 10000M;


To continue to use the existing tablespace model (OFA-compliant):

Run adgnofa.sql as follows. On the command line, indicate the as
NEW to create new product tablespaces (tablespaces for existing products are
not affected), or ALL to create tablespaces for new products and resize existing
product tablespaces.

UNIX:
$ cd $AD_TOP/patch/115/sql
$ sqlplus apps/xxxxxx @adgnofa.sql ALL

$sqlplus "/as sysdba"
@/u012/11i/ora/oracle/devsappl/ad/11.5.0/patch/115/sql/adcrtbsp.sql


alter database datafile '/db2/oradata/dev/index/jax01.dbf' resize 50M;


CREATE TABLESPACE APPLSYSD
DATAFILE '/db2/oradata/dev/data/applsysd01.dbf' size 200M
EXTENT MANAGEMENT LOCAL
UNIFORM SIZE 1M;

CREATE TABLESPACE APPLSYSX
DATAFILE '/db2/oradata/dev/data/applsysx01.dbf' size 200M
EXTENT MANAGEMENT LOCAL
UNIFORM SIZE 1M;


CREATE TABLESPACE CTXD DATAFILE '/db2/oradata/dev/data/ctxd01.dbf' SIZE 100M; AUTOEXTEND ON NEXT 5 MAXSIZE 200m;.


Applied database patch to create / update OWS packages
Login to 11i Database Tier 3835781
mkdir $ORACLE_HOME/appsutil/admin/OWS
cd $ORACLE_HOME/appsutil/admin/OWS
cp /R11isit/staging/patches/*3835781* .
@patch.sql


Installed XML Parser for PL/SQL
Login to 11i Database Tier

mkdir $ORACLE_HOME/appsutil/admin/xmlparser

cd $ORACLE_HOME/appsutil/admin/xmlparser

cp $COMMON_TOP/util/plxmlparser_v1_0_2.zip .
unzip plxmlparser_v1_0_2.zip - This file creates several subdirectories in the current location
cp $COMMON_TOP/util/XSU12_ver1_2_1.zip .
unzip XSU12_ver1_2_1.zip - This file creates subdirectory - OracleXSU12
cd /R11idev/db/9.2.0/appsutil/admin/xmlparser/lib/java
loadjava -user apps/oracle11i-r -v xmlparserv2.jar
loadjava -user apps/oracle11i-r -v xmlplsql.jar
cd ../sql
cat load.sql sqlplus apps/cl_11i_gbook_sta
cd /R11idev/db/9.2.0/appsutil/admin/xmlparser/OracleXSU12/lib
sh oraclexmlsqlload.ksh
mkdir $ORACLE_HOME/appsutil/admin/java
cd $ORACLE_HOME/appsutil/admin/java
cp /R11idev/oradata/R11iEXP/applmgr/r11iexpcomn/java/xmlparserv2.zip .
loadjava -user apps/oracle11i-r -v xmlparserv2.zip


Gathered database information
Login to 11i Mid tier
cd $APPL_TOP/admin/preupg
sqlplus apps/oracle11i@adupinfo.sql


Re-compile Invalids
sqlplus “/ as sysdba”
@$ORACLE_HOME/rdbms/admin/utlrp.sql
create table invalids_after_db_backup as select * from dba_objects where status = ‘INVALID’;


6.0 Auto Upgrade Tasks
Login to 11i Application Tier
Run Autoupgrade using adaimgr

$ adaimgr consolidated_tablespace=N


6.0.1 Post-Autoupgrade tasks
Login to 11i Database Tier
Re-compile Invalids
sqlplus “/ as sysdba”
@$ORACLE_HOME/rdbms/admin/utlrp.sql
create table invalids_after_autoupgrade as select * from dba_objects where status = ‘INVALID’;


6.0.2 Performed cold Backup of
Database


7.0 Autopatch Tasks
Login to 11i Application Tier
Applied AD.I.4 (4712852)

Applied 11.5.10.2 maintenance pack
cd $AU_TOP/patch/115/driver
adpatch options=nocopyportion,nogenerateportion

APPS account was locked and expired

bash-2.05b$ FNDCPASS apps/xxxxx 0 Y system/manager SYSTEM APPLSYS xxxx
APP-FND-01564: ORACLE error 28000 in AFPCOA

Cause: AFPCOA failed due to ORA-28000: the account is locked
.

The SQL statement being executed at the time of the error was: and was executed from the file .


So just unlock the password


SQL> alter user apps account unlock;

User altered.

SQL> conn apps/xxxxx
Connected.


Note 364614.1:Best Practices for Securing the E-Business Suite
Note 114930.1:Oracle Password Management Policy
Note 420001.1:adpatch Ora-28000 Account Locked apps

Upgrade to DB 10g fails with error - cannot generate contextfile

After 9i to 10g upgrade, i am going to Implement and run Autoconfig on the new Database home.
When i was run adbldxml in database, i got following error message.

bash-2.05b$ perl adbldxml.pl tier=db appsuser=apps appspasswd=xxxxx

Starting context file generation for db tier..

JRE_TOP not found at its desired location /u01/11i/uat/oracle/uatdb/10.2.0/jre/1.1.8
Restart adbldxml.pl with value for jtop as an necessary arguement

Then i was try following command.....

bash-2.05b$ perl adbldxml.pl tier=db appsuser=apps appspasswd=xxxx jtop=/u01/11i/uat/oracle/uatdb/9.2.0/jre/1.4.2

Starting context file generation for db tier..
Using JVM from /u01/11i/uat/oracle/uatdb/9.2.0/jre/1.4.2/bin/java to execute java programs..

The log file for this adbldxml session is located at:
/u01/11i/uat/oracle/uatdb/10.2.0/appsutil/log/adbldxml_09060216.log
UnsatisfiedLinkError exception loading native library: njni10

Could not Connect to the Database with the above parameters, Please answer the Questions below


Enter Hostname of Database server: zeus

Enter Port of Database server: 1521

Enter SID of Database server: uat

For errors, Check log file :/u01/11i/uat/oracle/uatdb/10.2.0/appsutil/log/adbldxml_09060216.log

Here i got following error message on logfile.
The Autoconfig log file reports following error :
StackTrace:
java.lang.ArrayIndexOutOfBoundsException: 3 >= 3
at java.util.Vector.setElementAt(Vector.java:543)
at oracle.apps.ad.context.GenerateContext.setJRETOP(GenerateContext.java:7483)
at oracle.apps.ad.context.GenerateContext.InstantiateRestForDB(GenerateContext.java:3057)
at oracle.apps.ad.context.GenerateContext.main(GenerateContext.java:8150)

Then i was applied latest AUTOCONFIG TEMPLATE ROLLUP PATCH. Then i resloved that problem.

Solution

To implement the solution, please execute the following steps :

1. Download and apply Patch 4709948 - 'TXK (FND) AUTOCONFIG TEMPLATE ROLLUP PATCH M (APRIL 2006)', which brings the latest Release of the GenerateContext.java used to build the context file

After Applied this patch, i was sucessfully created in XML file.

2. Synchronize the APPS-Tier files with the DB-Tier - appsutil directory

3. Execute Autoconfig on the DB-Tier

Result
bash-2.05b$ pwd
/u01/11i/uat/oracle/uatdb/10.2.0/appsutil/bin
bash-2.05b$ perl adbldxml.pl tier=db appsuser=apps appspasswd=xxxxxx

Starting context file generation for db tier..
Using JVM from /u01/11i/uat/oracle/uatdb/10.2.0/jdk/bin/java to execute java programs..

The log file for this adbldxml session is located at:
/u01/11i/uat/oracle/uatdb/10.2.0/appsutil/log/adbldxml_09060343.log

Enter the value for Display Variable: zeus:0.0

The context file has been created at:
/u01/11i/uat/oracle/uatdb/10.2.0/appsutil/uat_zeus.xml

========================

bash-2.05b$ adconfig.sh

Enter the full path to the Context file: /u01/11i/uat/oracle/uatdb/10.2.0/appsutil/uat_zeus.xml
Enter the APPS user password:
The log file for this session is located at: /u01/11i/uat/oracle/uatdb/10.2.0/appsutil/log/uat_zeus/09060347/adconfig.log

AutoConfig is configuring the Database environment...

AutoConfig will consider the custom templates if present.
Using ORACLE_HOME location : /u01/11i/uat/oracle/uatdb/10.2.0
Classpath : :/u01/11i/uat/oracle/uatdb/10.2.0/jdk/jre/lib/charsets.jar:/u01/11i/uat/oracle/uatdb/10.2.0/jdk/jre/lib/core.jar:/u01/11i/uat/oracle/uatdb/10.2.0/jdk/jre/lib/graphics.jar:/u01/11i/uat/oracle/uatdb/10.2.0/jdk/jre/lib/ibmcertpathprovider.jar:/u01/11i/uat/oracle/uatdb/10.2.0/jdk/jre/lib/ibmjaaslm.jar:/u01/11i/uat/oracle/uatdb/10.2.0/jdk/jre/lib/ibmjcefw.jar:/u01/11i/uat/oracle/uatdb/10.2.0/jdk/jre/lib/ibmjgssprovider.jar:/u01/11i/uat/oracle/uatdb/10.2.0/jdk/jre/lib/ibmjssefips.jar:/u01/11i/uat/oracle/uatdb/10.2.0/jdk/jre/lib/ibmjsseprovider.jar:/u01/11i/uat/oracle/uatdb/10.2.0/jdk/jre/lib/ibmorb.jar:/u01/11i/uat/oracle/uatdb/10.2.0/jdk/jre/lib/ibmorbapi.jar:/u01/11i/uat/oracle/uatdb/10.2.0/jdk/jre/lib/ibmpkcs.jar:/u01/11i/uat/oracle/uatdb/10.2.0/jdk/jre/lib/javaplugin.jar:/u01/11i/uat/oracle/uatdb/10.2.0/jdk/jre/lib/security.jar:/u01/11i/uat/oracle/uatdb/10.2.0/jdk/jre/lib/server.jar:/u01/11i/uat/oracle/uatdb/10.2.0/jdk/jre/lib/xml.jar:/u01/11i/uat/oracle/uatdb/10.2.0/jdk/lib/dt.jar:/u01/11i/uat/oracle/uatdb/10.2.0/jdk/lib/tools.jar:/u01/11i/uat/oracle/uatdb/10.2.0/jdbc/lib/ojdbc14.jar:/u01/11i/uat/oracle/uatdb/10.2.0/appsutil/java/xmlparserv2.zip:/u01/11i/uat/oracle/uatdb/10.2.0/appsutil/java:/u01/11i/uat/oracle/uatdb/10.2.0/jlib/netcfg.jar:/u01/11i/uat/oracle/uatdb/10.2.0/jlib/ldapjclnt10.jar

Using Context file : /u01/11i/uat/oracle/uatdb/10.2.0/appsutil/uat_zeus.xml

Context Value Management will now update the Context file

Updating Context file...COMPLETED

Attempting upload of Context file and templates to database...COMPLETED

Updating rdbms version in Context file to db102
Updating rdbms type in Context file to 64 bits
Configuring templates from ORACLE_HOME ...

AutoConfig completed successfully.

Upgrade to DB 10g fails with error - cannot generate contextfile Doc ID: Note:369179.1

Oracle 10g Install Linking Fails with Error on Pw-Syscall.Exp File

INFO: Start output from spawned process:INFO: ----------------------------------INFO:
INFO: Linking /progs2/11i/uat/oracle/uatdb/10.2.0/precomp/lib/proc
INFO: ld: 0706-003 Cannot find or read import file: /progs2/11i/uat/oracle/uatdb/10.2.0/lib/pw-syscall.exp ld:accessx(): A file or directory in the path name does not exist.
INFO: make: 1254-004 The error code from the last command is 255.
Stop.
INFO: End output from spawned process.INFO: ----------------------------------INFO: Exception thrown from action: makeException Name: MakefileExceptionException String: Error in invoking target 'relink' of makefile '/progs2/11i/uat/oracle/uatdb/10.2.0/precomp/lib/ins_precomp.mk'. See '/etc/oraInventory/logs/installActions2008-09-04_10-43-33AM.log' for details.Exception Severity: 1INFO: Exception handling set to prompt user with options to Retry IgnoreUser Choice: RetryINFO: The output of this make operation is also available at: '/progs2/11i/uat/oracle/uatdb/10.2.0/install/make.log'INFO:
INFO: Start output from spawned process:INFO: ----------------------------------INFO:
INFO: Linking /progs2/11i/uat/oracle/uatdb/10.2.0/precomp/lib/proc
INFO: ld: 0706-003 Cannot find or read import file: /progs2/11i/uat/oracle/uatdb/10.2.0/lib/pw-syscall.exp
INFO: ld:accessx(): A file or directory in the path name does not exist.
INFO: make: 1254-004 The error code from the last command is 255.
Stop.
INFO: End output from spawned process.INFO: ----------------------------------INFO: Exception thrown from action: makeException Name: MakefileExceptionException String: Error in invoking target 'relink' of makefile '/progs2/11i/uat/oracle/uatdb/10.2.0/precomp/lib/ins_precomp.mk'. See '/etc/oraInventory/logs/installActions2008-09-04_10-43-33AM.log' for details.Exception Severity: 1bash-2.05b$ pwd/etc/oraInventory/logs


Solutions:

1. Create an empty file pw-syscall.exp under Agent $ORACLE_HOME/lib.

2. Then Click Retry

Changing the Net Listener Port in Oracle Applications Server 10g

Change port number 1521 to 1531 or anyone

Find the step by step that i performed to configure a new listener .

System Overview

10g Application server with infrastructure and middle tier installed on the same box.

Infrastructure Tier Services
OID
HTTP Server

Middle Tier Application
Portal

OS Users

Infrastructure OS user: oracle
Middle Tier OS user: oracle

Task
Current Listener running on port 1521.
Configuring a new listener on port 1531

Shutdown Services.

Shutdown all the infrastructure and middle tier services.

INFRA

$opmnctl stopall
$emctl stop iasconsole

MIDDLE TIER

$opmnctl stopall
$emctl stop iasconsole

Shutdown Your Infrastructure Listener

$lsnrctl stop

Change The Listener Configuration

Make the change to have the new post number in the lsitener.ora file on your infrastructure tier.
bash-2.05b$ more listener.ora
# listener.ora Network Configuration File: /u01/scr/disco10g/OraHome_10/network/admin/listener.ora
# Generated by Oracle configuration tools.

SID_LIST_LISTENER =
(SID_LIST =
(SID_DESC =
(SID_NAME = PLSExtProc)
(ORACLE_HOME = /u01/scr/disco10g/OraHome_10)
(PROGRAM = extproc)
)
)

LISTENER =
(DESCRIPTION_LIST =
(DESCRIPTION =
(ADDRESS_LIST =
(ADDRESS = (PROTOCOL = TCP)(HOST = apollo.doyen.com)(PORT = 1531))
)
(ADDRESS_LIST =
(ADDRESS = (PROTOCOL = IPC)(KEY = EXTPROC1531))
)
)

)

Change Your TNSNAMES

After this you need to make the change reflecting the new port in your TNSNAMES.ora file on both the infrastructure tier and the middle tier.

bash-2.05b$ cat tnsnames.ora
# tnsnames.ora Network Configuration File: /u01/scr/disco10g/OraHome_10/network/admin/tnsnames.ora
# Generated by Oracle configuration tools.

BLDISCO =
(DESCRIPTION =
(ADDRESS = (PROTOCOL = TCP)(HOST = apollo.doyen.com)(PORT = 1531))
(CONNECT_DATA =
(SERVER = DEDICATED)
(SERVICE_NAME = bldisco.doyen.com)
)
)

EXTPROC_CONNECTION_DATA =
(DESCRIPTION =
(ADDRESS_LIST =
(ADDRESS = (PROTOCOL = TCP)(HOST = apollo.doyen.com)(PORT = 1531))
)
(CONNECT_DATA =
(SERVICE_NAME = PLSExtProc)
)
)

Also replicate this change in middle tier tnsnames.ora.


Start Your Listener
Start your infrastructure tier listener.


$lsnrctl start bldisco

Set The New Listener At The Database Level.

You must execute this command in your infrastructure database to have the parameter local_listener set to your new listener.


$sqlplus "/ as sysdba"
SQL> alter system set local_listener='bldisco';
system altered


Bounce The Database.

Stop and startup your meta data repository database to have it register the new listener name.

Start Your OID On The Infrastructure Tier
$opmnctl startproc ias-component=OID

Change The Port Number In OID.

Start the Oracle Directory Manager from your desktop if you have the client installed else you can use the one on the server at $ORACLE_HOME/bin/oidadmin


Click add button and provide 10g infra hostname


Provide infra username and password

UserName : orcladmin
Password : xxxxxxxx


Click Entry Management –> cn=OraleContext ->bldisco(SID NAME) -> orclnetdescstring chnage the value of the new port here


Change The Other Config Files.

Based on your installation you may need to change the following files also

/u01/scr/disco10g/OraHome_10/sysman/emd/targets.xml
/u01/scr/disco10g/OraHome_10/Apache/modplsql/conf/dads.conf

Managing Your 10g Application Server

Managing the application server primarily the startup and shutdown procedures. I will discuss the opmn tool by Oracle and also the Enterprise Manager

The process described here also holds good for other Oracle products like Oracle Collaboration suite and Oracle SOA suite.

Any application server would necessarily consist of a infrastructure Tier, it may or may not have a middle tier associated.

Starting Application Server Services


Order of Startup

As the middle tier is dependent on your infrastructure it is important that the infrastructure should be up and running before you proceed with the middle tier services.

To start OracleAS Infrastructure:

1. If your OracleAS Infrastructure contains OracleAS Metadata Repository, start it as
follows:

a. Set the ORACLE_HOME environment variable to the OracleAS Infrastructure
Oracle home.

b. Set the ORACLE_SID environment variable to the OracleAS Metadata
Repository SID (default is orcl).

c. Start the Net Listener:

ORACLE_HOME/bin/lsnrctl start

d. Start the OracleAS Metadata Repository instance:

ORACLE_HOME/bin/sqlplus /nolog
SQL> connect SYS as SYSDBA
SQL> startup


SQL> quit


e. Start the Oracle Enterprise Manager 10g Database Control:

(UNIX)ORACLE_HOME/bin/emctl start dbconsole
(Windows)ORACLE_HOME\bin\emctl start idbconsole


Using runstartupconsole.sh

You can start up the infrastructure tier services using the runstartupconsole.sh script located at your $ORACLE_HOME/bin/ on the machine which contains your infrastructure.


$ cd $ORACLE_HOME/bin
$runstartupconsole.sh start


This command will startup

The AS Meta Data Repository Instance

The Listener

The Enterprise Manager Console

Infrastructure Process Such as OID,OC4J_security,SSO etc.


To startup the middle Tier Services you log in to your middle tier OS user and run the the runstartupconsole.sh from the middle tier ORACLE_HOME.


$ cd $ORACLE_HOME/bin
$runstartupconsole.sh start


This Command will start up

The 10g Enterprise Manager

All OPMN managed process for the middle tier like portal

Using Enterprise Manager Console

You can also use the 10g Enterprise Manager console to start up the infrastructure tier and middle tier services, however you must start up the enterprise manager explicitly before you can use it. The emctl command is used to startup the enterprise manager. The location is $ORACLE_HOME/bin


Start the Application Server Control Console:


(UNIX)ORACLE_HOME/bin/emctl start iasconsole

$emctl start iasconsole


Using OPMN

OPMN stands for the Oracle Process Manager and Notification, is a tool with you can manage the OPMN managed Infrastructure and Middle Tier Porcess. The opmnctl executable is located at the $ORACLE_HOME/opmn/bin.

opmnctl start

This command will start up your opmn process

opmnctl startall


This will start up the opmn process and all process managed by opmn


Start components:

(UNIX) ORACLE_HOME/opmn/bin/opmnctl startall
(Windows) ORACLE_HOME\opmn\bin\opmnctl startall


opmnctl startporc ias-component=component

This will start a specific opmn managed process like SSO
You can also start using the sub-porcess of a component using

opmnctl startproc process-type=process

You could also restart the processs using

opmnctl restartproc ias-component=component

opmnctl restartproc process-type=process


However before using OPMNCTL you must have started your Metadata Respositery Database Instance and the Listener manually.

Shutdown of Application Tier Services


Order Of Shutdown


Your Middle tier Services must be shutdown before you shutdown your infrastructure services.


Using runstartupconsole.sh

You can shutdown the infrastructure tier services using the runstartupconsole.sh script located at your $ORACLE_HOME/bin/ on the machine which contains your infrastructure.

$ cd $ORACLE_HOME/bin

$runstartupconsole.sh stop


This command will stop

All infrastructure tier services

The 10g EM console

The meta data repository instance

The listener

For middle Tier services you must run this command for the middle tier ORACLE_HOME.
Using Enterprise Manager Console

You can also use the 10g EM console to shutdown your middle tier and infrastructure services.

After that you must shutdown your EM console manually using the emctl command

emctl stop iasconsole

Stop the Application Server Control Console:

(UNIX)ORACLE_HOME/bin/emctl stop iasconsole
(Windows)ORACLE_HOME\bin\emctl stop iasconsole


You can also shutdown the Infrastructure services using the EM Console of the infrastructure tier after which you must manually shutdown the EM console manually using emctl at the infrastructure tier.


You must also remember to bring down your Meta Data Repository and Listener manually from the infrastructure home after all the services are brought down.


Using OPMN

Using opmnctl you can shutdown your middle tier services and infrastructure services.

opmnctl shutdown

This shutdown the opmn process and along with it all the managed opmn processes

opmnctl stopall

This command stops all opmn managed process for a particular tier.

Stop components:


(UNIX) ORACLE_HOME/opmn/bin/opmnctl stopall

(Windows) ORACLE_HOME\opmn\bin\opmnctl stopall


You can also stop a specify OPMN managed component using

opmnctl stopproc ias-component=component

or

opmnctl stopproc process-type=process

The EM console on the middle tier and the infrastructure tier needs to be brought down manually using emctl stop iasconsole.
Also the Meta Data Repository Instance and Listener need to be brought down manually.

If your OracleAS Infrastructure contains OracleAS Metadata Repository, stop it as
follows:


a. Set the ORACLE_HOME environment variable to the OracleAS Infrastructure
Oracle home.

b. Set the ORACLE_SID environment variable to the OracleAS Metadata
Repository SID (default is orcl).

c. Stop the OracleAS Metadata Repository instance:


ORACLE_HOME/bin/sqlplus /nolog
SQL> connect SYS as SYSDBA
SQL> shutdown

SQL> quit

d. Stop the Net Listener:

ORACLE_HOME/bin/lsnrctl stop

Managing Log Files on Oracle AS 10g


Changing Schema Passwords Using the Application Server Control Console

Oracle 10g AS default Password


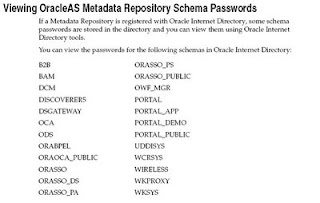
Some schemas store their passwords in Oracle Internet Directory. You must change
their passwords using the Application Server Control Console so the password is
updated in both the database and Oracle Internet Directory.


1.0 To change a schema password using the Application Server Control Console:


1. Depending on the schema, navigate to the home page for the middle-tier instance
or the Infrastructure.
2. On the home page, click Infrastructure.
3. On the Infrastructure page, click Change Schema Password.
4. On the Change Schema Password page, select the schema. Enter the new
password in the Password and Confirm Password fields. Click OK.


1.1 Changing Schema Passwords Using SQL*Plus


You can change some schema passwords directly in the database using SQL*Plus. To
do so, connect to the database as a user with SYSDBA privileges and issue the
following command:


SQL> ALTER USER schema IDENTIFIED BY new_password;
For example, to change the DCM schema password to abc123:
SQL> ALTER USER DCM IDENTIFIED BY abc123;

1.2 Changing Schema Passwords in Oracle Internet Directory


A few schemas (DCM, B2B, OWF_MGR) require you to manually update the
password in the Metadata Repository and in Oracle Internet Directory. Use the
following procedure to change these passwords:


1. Start Oracle Directory Manager:
■ On UNIX, use the following command:
ORACLE_HOME/bin/oidadmin


■ On Windows, navigate to Oracle Directory Manager (Start, Programs, Oracle
Application Server Infrastructure - Oracle_Home, Integrated Management
Tools, Oracle Directory Manager)


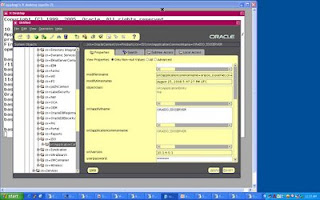
2. Log in to Oracle Directory Manager as the orcladmin user.

3. In the System Objects frame, expand Entry Management, expand
cn=OracleContext, expand cn=Products, expand cn=IAS, expand cn=IAS
Infrastructure Databases, and expand orclReferenceName=dbname for the
Metadata Repository.


4. Select the OrclResourceName=schema_name entry for the schema whose
password you want to change.


5. In the Properties tab, update the password in the orclpasswordattribute field.

6. Click Apply.


How To Reset The SSO Application Entry Password Doc ID: Note:428134.1
SSO Change Password Will Fail if Number of Grace Logins is Set to One Doc ID: Note:278807.1
How To Change Passwords When OID Is Integrated with E-Business Suite Doc ID: Note:422731.1
Changing Single Sign-On(Orasso) schema Password
Doc ID: Note:415753.1